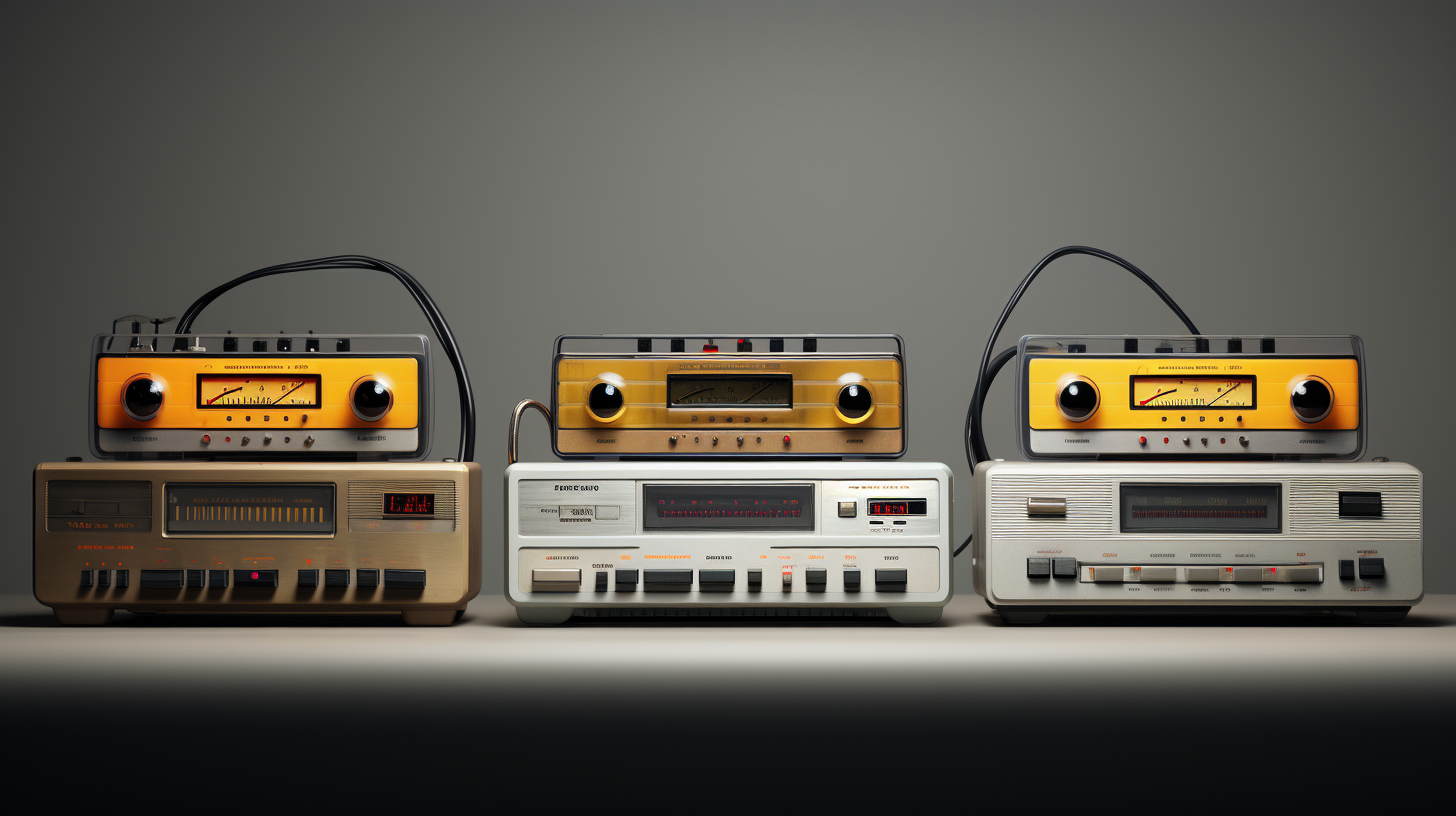
Introduction to Cassette Players: A Brief Overview
‘Introduction to Cassette Players: A Brief Overview’ is a comprehensive introduction to the world of cassette players, aimed at providing readers with a foundational understanding of these classic audio devices. It serves as a precursor to the more detailed exploration of cassette player buttons and functions in ‘A Guide to Cassette Player Buttons and Functions’.
The overview begins by discussing the history and significance of cassette players, highlighting their heyday in the 1980s and 1990s as the primary portable music player. It highlights the retro charm and nostalgia associated with cassette players, which have experienced a resurgence in recent years among audiophiles and vintage enthusiasts.
The overview further delves into the mechanics of cassette players, exploring how these devices functioned to play audio tapes. It explains the basic components, such as cassette compartments, playback heads, and motors, and elucidates the process of converting magnetic signals from the tape into audible sound. Additionally, the overview mentions different types of cassette players, such as portable walkmans and home stereos, to familiarize readers with the various variants available.
By providing this foundational knowledge, ‘Introduction to Cassette Players: A Brief Overview’ prepares readers for the more in-depth discussion on cassette player buttons and functions in the subsequent guide. It ensures that readers have a solid understanding of the essentials of cassette players, setting the stage for a comprehensive exploration of the buttons and functions that make these devices so intriguing and versatile.
Getting Started: Powering On and Off
Getting started with a cassette player is an essential step towards enjoying your favorite tapes. Powering on and off is a fundamental function, and understanding how to do it correctly ensures smooth operation. To power on the cassette player, locate the power button, typically located on the front panel or side of the device. Press and hold the power button until the player powers on. Once powered on, you will hear a clicking sound or see a small indicator light to confirm it is active.
To power off the cassette player, find the power button again and press and hold it until the player shuts down. It is essential to power off the device correctly to avoid any potential damage to the internal components and conserve battery life. Some cassette players may have a separate power button for each function, such as play, rewind, or fast forward. In this case, ensure all buttons are disengaged before turning off the device.
By familiarizing yourself with the power button and how to properly turn on and off your cassette player, you can enjoy a hassle-free experience and extend the lifespan of your device. As you become more acquainted with your cassette player, you can explore its various functions and buttons to enhance your audio playback experience. Remember to consult the user manual for any specific instructions related to your cassette player’s power on/off feature.
Loading and Ejecting Cassettes: How to Properly Handle Tapes
Loading and ejecting cassettes are essential functions when using a cassette player, and it is crucial to handle tapes properly to ensure their longevity and quality of playback. When loading a cassette, the first step is to locate the tape deck and press the eject button, which will open the cassette compartment. Carefully take the cassette and hold it with one hand on each side, making sure not to touch the exposed tape. Align the cassette’s holes with the corresponding pins in the tape deck, and gently insert it until it locks into place.
To eject a cassette once you have finished listening, press the eject button again. The cassette deck will release the tape, and you can carefully remove it by grasping it from the sides. Avoid yanking or pulling on the tape itself, as this can damage it. Once the cassette is removed, ensure that the tape is fully rewound before storing it to prevent any tangles or damage. It is also advisable to place the cassette in a protective case to shield it from dust and other environmental factors.
Handling cassettes properly not only protects their integrity but also improves the sound quality during playback. By avoiding rough handling, touching the tape, or exposing it to dust and moisture, you can ensure that your cassettes last longer and provide a better listening experience. Taking a few extra moments to load and eject tapes carefully can greatly contribute to the overall enjoyment of using a cassette player.
Play and Pause: Controlling Playback
Play and Pause are basic controls that allow users to start and stop the playback of their cassette tapes on a cassette player. These buttons are essential for a smooth and enjoyable listening experience. The Play button, usually indicated by a triangle symbol, initiates the playback of the tape by rotating the cassette spindles and engaging the tape heads to read the recorded audio.
Once the cassette is playing, the Pause button comes into play. Pressing this button temporarily halts the playback without disengaging the tape heads. This is especially useful when needing to momentarily pause the music or speech on the tape, such as when answering a phone call or during an interruption. It allows users to quickly resume playback from where they left off without having to rewind or fast forward the tape.
These basic playback controls – Play and Pause – are typically found prominently on the front panel of cassette players, ensuring easy access and intuitive operation. They are fundamental for managing the flow of audio and providing users with control over their listening experience. Whether enjoying music, lectures, or audio recordings, the Play and Pause buttons make it simple to start and stop the playback whenever necessary.
Fast Forward and Rewind: Navigating Within a Cassette
Fast Forward and Rewind: Navigating Within a Cassette
Navigating within a cassette tape is an essential function of any cassette player, and the buttons responsible for fast forwarding and rewinding play a crucial role in this process.
Fast forwarding allows users to quickly skip forward through parts of the tape they are not interested in or to locate a particular section. By pressing the fast forward button, the tape moves at an accelerated speed, allowing users to jump ahead to a desired point in the recording. This function is particularly useful for finding specific songs, chapters, or sections within a cassette.
On the other hand, rewinding enables users to move backward through the tape, either to replay a section they enjoyed or to return to a previous point in the recording. By pressing the rewind button, the tape is swiftly wound back onto the spool, ensuring that it is ready for playback from an earlier point. This function is particularly helpful when looking to revisit a favorite song, review important information, or simply to listen to a section again.
Understanding how to effectively utilize the fast forward and rewind buttons on a cassette player is key to navigating within a cassette and making the most of your listening experience. By mastering these functions, you can quickly and easily find the content you desire, significantly enhancing your enjoyment of cassette tapes.
Stop: Safely Stopping Playback
‘Stop: Safely Stopping Playback’ is an essential function on a cassette player that allows users to halt the playback of audio content without causing any damage to the cassette or the player itself. When the ‘Stop’ button is pressed, the player’s motor slows down gradually, minimizing the risk of abruptly stopping the cassette tape and potentially damaging it.
To ensure a safe stop, it is advisable not to forcefully press or yank out the cassette when the ‘Stop’ button is engaged. Instead, it is best to wait for the player to come to a complete stop before removing the cassette. This precautionary measure helps avoid any sudden movements that might cause the tape to get tangled or jammed inside the player.
By utilizing the ‘Stop’ function appropriately, users can maintain the longevity of their cassette tapes and the overall functionality of their cassette players. It is always a good practice to handle cassettes with care and follow proper protocols to ensure a seamless playback experience and to prolong the life of the equipment.
Record: Creating Personalized Cassette Tapes
Recording personalized cassette tapes was a popular activity during the heyday of cassette players. It allowed individuals to curate their own collection of songs and create unique mixes for various occasions. To begin the process, one would need a blank cassette tape and a cassette player with recording capabilities.
To start recording, insert the blank tape into the player and locate the record button. This button is usually labeled with a red dot or the word “record.” Pressing this button engages the recording function, and the tape will start rolling. Choose the source of the audio by pressing the corresponding button, such as “tape,” “radio,” or “aux.”
Once the desired audio source is selected, press the play button to start playing the music or audio. As the audio plays, it will be recorded onto the blank tape in real-time. Use the pause button if you want to temporarily stop the recording or pause the music playback. To resume recording, simply press the record button again.
When you finish recording a song or segment, use the stop button to halt the recording process. Rewind or fast-forward buttons can be used to navigate through the tape or find specific sections of the recorded content. Remember to monitor the recording levels using the volume control knob to ensure optimal sound quality.
Recording personalized cassette tapes provided a creative outlet for music enthusiasts to express their tastes, compile favorite songs, and share music with others. It allowed for a more intimate and personal music experience, distinct from pre-packaged albums or playlists.
Auto-Reverse: Switching Sides Automatically
Auto-reverse is a feature found in many cassette players that allows tapes to play continuously without manually flipping them over. This function automatically switches sides in order to maintain uninterrupted playback. It is a convenient feature for those who enjoy listening to music or audio content without any interruptions.
When the auto-reverse function is activated, the cassette player detects when it reaches the end of one side and automatically switches the playback to the other side. This ensures that listeners can enjoy a seamless and uninterrupted listening experience without needing to manually flip the cassette. Furthermore, it eliminates the need to constantly monitor the playback and intervene when the tape reaches the end.
Auto-reverse is commonly found in portable cassette players, car stereo systems, and other cassette players that support continuous playback. It is a valuable feature that allows individuals to focus on the content they are listening to, whether it is music, audio books, or personal recordings. With auto-reverse functionality, listeners can fully immerse themselves in their favorite audio without any unnecessary interruptions.
Dolby Noise Reduction: Enhancing Sound Quality
Dolby noise reduction is a technology that has greatly enhanced sound quality in cassette players. It was developed by Dolby Laboratories in the 1960s and became a standard feature in many cassette players and recorders.
The purpose of Dolby noise reduction is to minimize the background noise that is inherent in analog audio recordings. When playing a cassette, there is often a noticeable hiss or hum in the background, which can distract from the overall listening experience. Dolby noise reduction reduces this noise by analyzing the audio signal and applying specific filters to diminish the unwanted noise.
In terms of cassette player buttons and functions, Dolby noise reduction typically has its own dedicated button that can be toggled on and off. When activated, it engages the Dolby noise reduction circuitry, improving the sound quality by reducing the noise level. It is important to note that in order to fully benefit from Dolby noise reduction, both the cassette player and the cassette tape must be equipped with Dolby noise reduction technology.
Overall, Dolby noise reduction has been a significant advancement in audio technology, allowing listeners to enjoy cleaner and more immersive sound quality when listening to cassette tapes. By minimizing background noise, it enhances the overall listening experience and brings out the true potential of the audio recordings.
Volume Control: Adjusting the Audio Level
Volume control is a crucial function found on cassette players that allows users to adjust the audio level to their preference. It plays a significant role in enhancing the listening experience by providing the right balance between the sound’s clarity and intensity. By turning the volume control dial or pressing the volume buttons, users can increase or decrease the loudness of the audio output.
When adjusting the volume level on a cassette player, it is important to strike a balance. Setting the volume too low may result in a barely audible sound, while cranking it up too high can cause distortion or even damage to the speakers. It is recommended to start with a moderate volume level and make fine adjustments based on personal preference and the ambient noise level.
The volume control function on a cassette player can significantly impact the overall enjoyment of music or audio recordings. It provides flexibility for users to tailor the listening experience according to their preferences and the surrounding environment. Whether you prefer to listen quietly for late-night relaxation sessions or rock out to your favorite tunes at a higher volume, the volume control options on a cassette player give you the power to adjust the audio level to just the right level.
Bass and Treble: Customizing Sound Settings
Bass and treble controls are an essential feature of cassette players, allowing users to customize their sound settings to suit their preferences. These controls adjust the levels of the low-frequency (bass) and high-frequency (treble) sounds, effectively enhancing or reducing their prominence in the audio playback.
To access the bass and treble controls on a cassette player, look for dedicated buttons or knobs labeled “Bass” and “Treble.” Adjusting the bass control to a higher level will amplify the low-frequency sounds, resulting in a deeper and more powerful audio experience. Conversely, reducing the bass will remove some of the low-end rumble, which can be useful in minimizing distortion or when listening in environments where too much bass may overpower the other elements.
Similarly, adjusting the treble control can enhance or diminish the high-frequency sounds in the audio playback. Increasing the treble will bring out the finer details of the music, making the sound brighter and more crisp. Lowering the treble, on the other hand, can soften the audio and reduce the sharpness of the high-frequency sounds, which may be beneficial when listening to particularly bright or harsh recordings.
It’s important to note that the optimal bass and treble settings will vary depending on personal preferences, the type of music being played, and the quality of the cassette recording. Experimentation is key to finding the perfect balance that suits your listening taste and the characteristics of the audio source.
Line-In and Line-Out: Connecting External Devices
Line-In and Line-Out connections are essential features of cassette players, allowing users to connect external audio devices for improved functionality and versatility. The Line-In port enables users to directly record audio from external sources, such as a microphone, CD player, or computer. This feature is particularly useful for individuals who want to transfer or digitize their cassette tapes or create mixtapes from different audio sources. By connecting an external device via the Line-In port, users can easily capture high-quality sound directly onto their cassette tapes.
On the other hand, the Line-Out port allows users to play audio from the cassette player through external speakers or headphones. This function enables users to enjoy their favorite music or recordings with enhanced sound quality, especially by connecting the cassette player to high-quality speakers or audio systems. By using the Line-Out port, users can also connect their cassette player to a sound mixing console or computer interface to further enhance and manipulate the audio output.
Understanding how to properly utilize the Line-In and Line-Out connections on a cassette player can greatly enhance the usability and flexibility of the device. Whether you want to record external audio sources onto a cassette tape or enjoy a more immersive listening experience through external speakers, Line-In and Line-Out features are essential tools that provide versatility and expand the possibilities of your cassette player.
Headphone Jack: Enjoying Private Listening
In the realm of cassette players, the headphone jack is a significant feature that allows users to enjoy private listening experiences. The headphone jack, usually located on the front or side of the cassette player, allows individuals to connect their headphones and immerse themselves in the audio without disturbing those around them. This is particularly convenient in situations where you want to listen to your favorite music, audiobooks, or recordings in solitude or during late-night listening sessions.
By plugging your headphones into the headphone jack, you can enjoy the full audio output of the cassette player without any external distractions. This provides a more immersive and personalized listening experience, allowing you to fully appreciate the nuances and details of the audio content. The headphone jack also ensures a clear and direct audio signal, without any interference or loss in sound quality that may occur when using external speakers.
Furthermore, the headphone jack on cassette players often comes with adjustable volume control, allowing you to easily find the perfect sound level that suits your preferences. This gives you full control over your listening experience, ensuring that you can enjoy your favorite content at a volume that is comfortable and enjoyable for you. So, whether you want to revisit the nostalgia of cassette tapes or dive into a new audio adventure, don’t forget to take advantage of the headphone jack on your cassette player for a truly immersive and personal listening journey.
Troubleshooting Tips: Common Issues and Solutions
Troubleshooting Tips: Common Issues and Solutions is an essential section in A Guide to Cassette Player Buttons and Functions. This section aims to assist users in resolving common problems they may encounter while using their cassette players. It provides concise troubleshooting tips to help users identify and resolve issues on their own, promoting a smooth and uninterrupted listening experience.
One common issue users face is the tape getting stuck in the cassette player. The guide recommends users to first make sure that the eject button is working properly. If it’s functional, gently press it while trying to remove the tape. In case the eject button is unresponsive, the guide advises users to turn off the player, unplug it from the power source, and carefully open the cassette player to manually remove the stuck tape.
Another issue that users often encounter is poor sound quality. The troubleshooting tips in the guide suggest checking the volume level to ensure it is neither too low nor too high. They also advise inspecting the headphone or speaker connections to ensure they are securely plugged in. Additionally, users are encouraged to clean the cassette player’s heads and rollers using a cleaning kit to eliminate any built-up dust or debris that may be affecting the sound quality.
By providing troubleshooting tips for common issues like tape jamming and poor sound quality, A Guide to Cassette Player Buttons and Functions equips users with the knowledge and skills necessary to effectively address these problems. This ultimately enhances the overall user experience, allowing users to fully enjoy their cassette player and its features without interruption.
Proper Maintenance: Taking Care of Your Cassette Player
Proper maintenance is essential for ensuring the longevity and optimal performance of your cassette player. By taking a few simple steps, you can keep your device in great shape and enjoy your favorite music for years to come.
First and foremost, it is crucial to clean your cassette player regularly. Dust, dirt, and debris can accumulate over time and affect the playback quality. Use a soft cloth or a cleaning solution recommended by the manufacturer to gently wipe the exterior and interior parts of the player. Be cautious not to apply excessive force or use abrasive materials that could damage the delicate components.
Next, taking care of the cassette tapes themselves is equally important. Keep them in their cases when not in use to protect them from dust and moisture. Avoid exposing them to direct sunlight or extreme temperatures, as this can cause the tapes to warp or deteriorate. Additionally, if you notice any loose tape or tangled sections, gently rewind or fix them before inserting the cassette into the player.
Furthermore, don’t forget to periodically check and replace the player’s batteries or power source. Low batteries can affect the sound quality, so make sure to use fresh ones or rechargeable batteries if applicable. Additionally, protect your cassette player from extreme temperature fluctuations or moisture, as these can negatively impact the internal electronics.
By following these simple maintenance guidelines, you can keep your cassette player in top condition and enjoy the nostalgic experience of listening to your favorite tunes with great audio quality. Remember, proper maintenance will not only extend the lifespan of your device but also enhance your overall listening pleasure.
Conclusion: Mastering Cassette Player Buttons and Functions
Conclusion: Mastering Cassette Player Buttons and Functions
In this comprehensive guide, we have explored the different buttons and functions of a cassette player and learned how to navigate through them efficiently. The cassette player may seem like a relic from the past, but it still holds nostalgic value for many individuals who appreciate its unique charm.
Understanding the various buttons and functions is essential for unlocking the full potential of a cassette player. We have covered the essential controls, such as the play, stop, and rewind buttons, which allow you to control the basic playback functions of your cassette tapes. Additionally, we have discussed the importance of the eject button, which ensures the safe removal of tapes from the player.
Additionally, we have delved into more advanced features, like the Dolby noise reduction and auto-reverse functions, which enhance the audio quality and convenience of cassette playback. These buttons help to eliminate background hissing and provide a seamless listening experience.
By mastering cassette player buttons and functions, you can fully immerse yourself in the unique world of cassette tapes, rediscovering classic sounds and reliving cherished memories. So, whether you are a tape enthusiast or just seeking a nostalgic experience, this guide has equipped you with the knowledge to navigate and utilize the various buttons and functions of a cassette player with confidence. Enjoy your journey into the world of cassettes!
Leave a Reply